Lesson Plan
Elbow and Knee Pots by ECSDM
Grade Levels
Intermediate, 6th Grade, 7th Grade, 8th Grade
Description
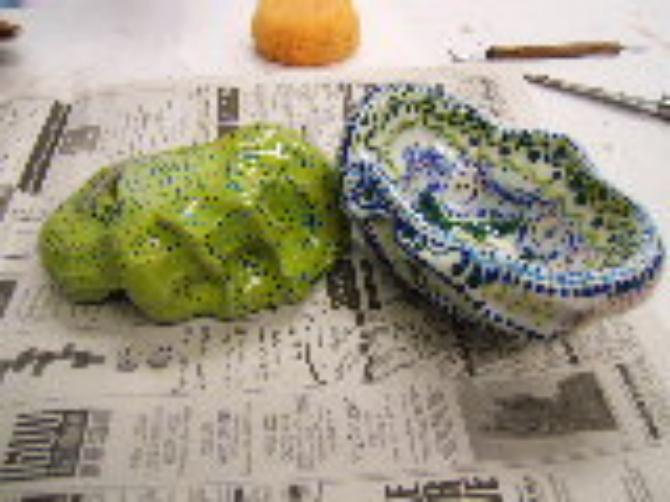
In this lesson, students will create free form clay pots using their elbows and knees.
OBJECTIVE
Students will...
- Become familiar with the medium clay and how it can be manipulated.
- Learn to create clay pots using their elbow and knee joints.
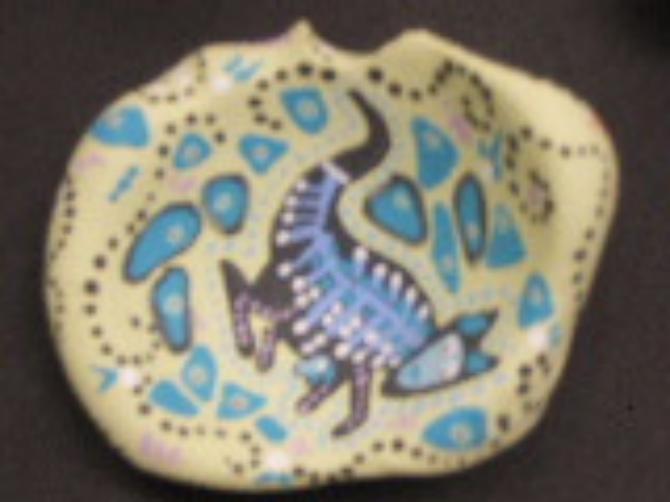
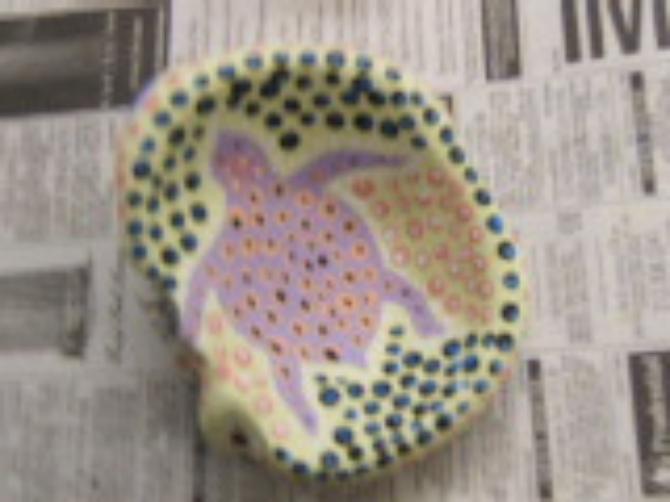
- Learn how to paint as the Australian Aboriginals
- Learn to apply under glazes and clear glaze to their clay pots.
DURATION
Three, 45-minute class periods.
MATERIALS/RESOURCES
- Clay, Newspapers, Water Spray Bottle, Wooden Skewer, Under Glaze, Clear Glaze, Paint Brushes, Saran Wrap
Clay Coiled Pot.notebookClay Elbow Pot.notebookClay Pinch Pot.notebook
PROCEDURE
Day 1
- Introduce students to the directions for the clay pots, utilizing the SMART Board Notebook on Clay Elbow and Knee Pots.
- Pass out clay to students the size of a tennis ball.
- Using the palm of your hands and a flat, hard surface covered in newspaper.
- Students can begin to wedge their clay removing unseen air bubbles.
- Round the clay into a ball.
- Hold the ball of clay in one hand and hold up the other arm so that the elbow is parallel with the floor.
- Gently make an indent with the elbow into the clay. Do this one more time.
- Then begin tapping the clay to the elbow repeatedly until the clay has an opening.
- Repeat this process using the knee joint.
- Wrap the clay pots in saran wrap to keep them moist overnight.
DAY 2
- Review the Smart Board notebook on Clay Elbow and Knee Pots.
- Focus on the Aboriginal Art...Dot Painting, and X-ray Painting.
- Apply this painting technique to the elbow and knee pots.
- First…
- Unwrap the clay pots from the saran wrap.
- Under glaze the pots with one color using three even coats.
- Allow the coats to dry thoroughly in between each application.
- Second…
- When pots are dry, begin painting designs using under glaze.
- Create a design that flows over the pot,
- Using color and pattern will encourage a rhythmic design.
- If using the Dot Painting technique, use the other end of the paintbrush to apply the dots.
- Allow pots to dry thoroughly.
- Fire the clay pots in the kiln.
DAY 3
- Apply three to four even coats of clear glaze for the final finish on the clay pots.
- Complete a reflection/rubric form.
ASSESSMENT
- Teacher evaluation of finished clay pots.
- Student reflection/rubric form.
STUDENT ARTWORK
Click below for selected examples:
Vocabulary
- Iconography: Symbolic representation.
- Glaze: To cover with a smooth, glossy surface or coating.
- Under Glaze: A ceramic paint applied directly to greenware
- Kiln: A furnace or oven for burning, baking or drying pottery.
- Clay: A fine-grained earthy material that is plastic when wet and hardens when heated.
- Wedge: To pound clay in order to remove air bubbles.

