Lesson Plan
Dream Catcher by ECSDM
Grade Levels
Intermediate, 7th Grade
Objectives
Students will…
- Learn to make a dream catcher out of basket reed and yarn using traditional Native American methods.
- Read and analyze various traditional stories associated with dream catchers.
- Analyze and discuss famous Native American dream catchers.
Procedure
- As a class read a variety of traditional stories associated with dream catchers, and look at various dream catchers.
- Teacher demonstration on how to make a dream catcher in four separate steps. Students will follow along during the teacher demonstration for each step.
Steps:
- Taping the basket reed together.
- Covering the outer ring with yarn.
- Weaving the center using yarn.
- Adding beads and feathers.
SMART Board
This instructional content was intended for use with a SMARTBoard
Author
Janet W. Andrews-Coyle, Enlarged City School District of Middletown
Description
- Using the traditional methods of Native American Indians, students will design and create their own dream catcher.
Resource/Materials
Dreamcatcher.notebook
Vocabulary
- Dream Catcher- In Native American culture, a dream catcher is a handmade object based on a hoop (traditionally of willow), incorporating a loose net, and decorated with items unique to the particular dream catcher. There is a traditional belief that a dream catcher filters a person's dreams, letting through only the good ones. There are related traditional stories.
- Native American Indian- People indigenous to the Americas, living there prior to European colonization. This term encompasses a large number of distinct tribes, states, and ethnic groups, many of them still enduring as sovereign nations.
- Basket Reed- Broad-leaved grasses growing along the banks of streams, cut and dried for various uses.
- Weaving- To become interlaced, woven or interwoven.
Duration
- Three, 45-minute class periods
Materials/Resources
Art Supplies:
- Basket Reed
- Masking Tape
- Yarn
- Beads
- Feathers
Day 1
- Begin lesson with a traditional story about dream catchers and discuss the reading as a class.
- Begin constructing the hoop with basket reed and wrapping it with yarn.
Following a teacher demonstration step by step... (demonstration will go along with the SMART Board Notebook.)
- Students should create a hoop about 8-10" in diameter, and secure it in place with masking tape (do this in several areas).
- Students will then select two or three colors of yarn to wrap around the hoop.
- Knot the yarn together at one end, and then tie and knot it on to the hoop.
- Wrap yarn around the hoop snug (careful because reed is dry and can break).
- Make sure the yarn is being wrapped evenly next to one another.
- Try not to bunch or overlap the yarn.
- Wrap the entire hoop with yarn, and then tie a knot.
Day 2
- Review previous day's lesson on dream catchers.
- Continue lesson with visuals of dream catchers made by Native American Indians from the SMART Board Notebook.
- Discuss and analyze the works of art and compare them to the dream catchers the class is making.
Following a teacher demonstration step by step... (demonstration will go along with the SMART Board Notebook.)
- Begin with a piece of yarn several yards long.
- Tie one end to the hoop, and roll the other end of the yarn into a ball for easily handling when weaving.
- Begin looping around the hoop about 10 to 12 times ending at the starting point.
- Second time around...
- Begin weaving through the yarn loops created on the hoop.
- Weave all the way around to the starting point again.
- Continue this process until you have reached the center of your web.
Remember~
- You may need to attach more yarn to the current piece in order to complete the web.
- You can add beads at any time by just unraveling your yarn ball and sliding the bead through the end of the yarn and send it down into your web.
- Repeat this as may times as you want.
Day 3
- Review previous day's lesson on dream catchers.
- View various dream catchers from the SMART Board Notebook and discuss ways to add feathers once the dream catcher is completed.
Following a teacher demonstration step by step... (demonstration will go along with the SMART Board Notebook.)
- Students will finish weaving the web and tie off the end of the yarn.
- Students will then add feathers to their dream catcher.
- Students will then complete an rubric/evaluation form and hand their project in to the teacher.
Assessment
- Completed Dream catcher.
- Completed Student Evaluation Form.
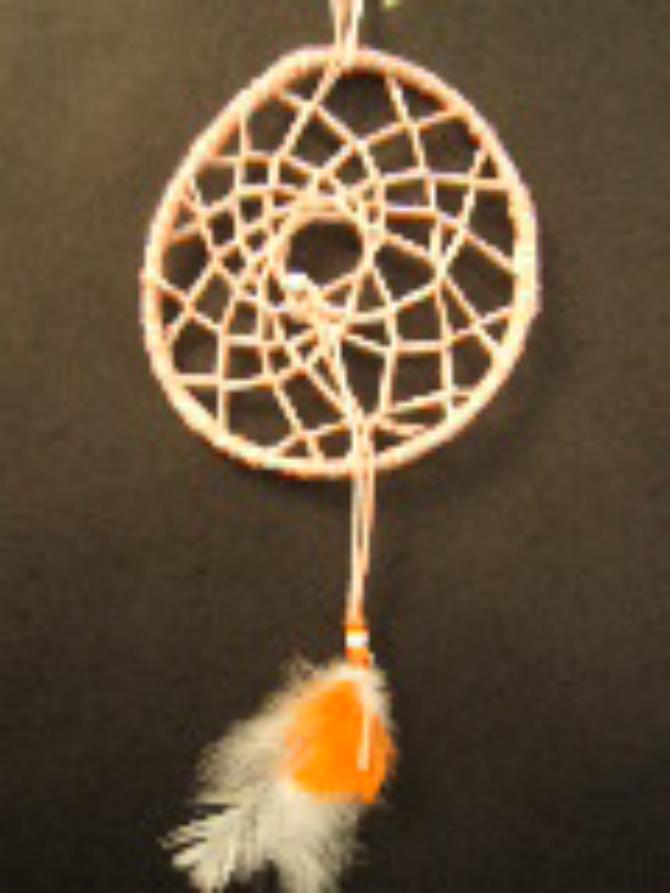
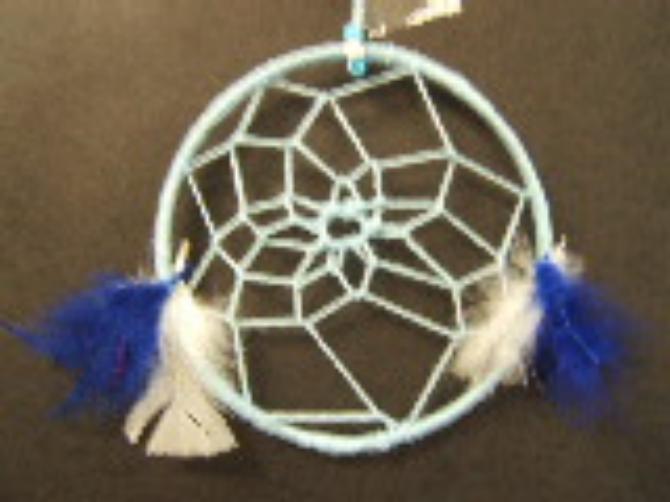
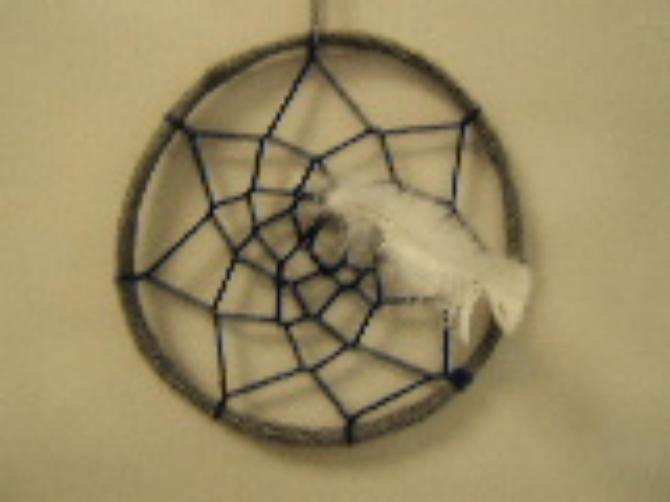
Student Artwork
- Examples of student artwork