Lesson Plan
Mirror Image Name by ECSDM
Grade Levels
Intermediate, 6th Grade
Day2
- Review information on mirror image from the previous day using the SMART Board Notebook on "Reflections in Art".
- Students will watch a teacher directed demonstration on how to create a mirror image name using the SMART Board and Microsoft Office Paint.
- A discussion will take place on how letters look in mirror image.
- Students will watch a teacher directed demonstration on how to draw a name in mirror image across the bottom of the white drawing paper.
- Students can begin to draw their letters.
- Students must continue to draw in capital letters and in block or bubble form.
- Students must draw their letters from the fold to the bottom of the paper, so letters are six inches.
- After clean up, students will access Art Dabbler and brainstorm different patterns to draw inside their block or bubble letters.
Day 3
- Introduce patterns and designs utilizing the SMART Board and Art Dabbler.
- Explain to students that they can create different patterns and designs in each letter of their name.
- Students can also create a themed design (ex The Yankees, logo, favorite team player number, ball game food, uniform design) etc...
- However, students must remember that their patterns and designs will have to be drawn in mirror image.
- Patterns and designs need to be drawn on the larger side in order to marker them in.
- Patterns and designs will need to be kept to a minimum of six in each letter in order to marker (ex. draw six large circles apposed to thirty little circles)
- Students can begin to draw.
- After clean up, discuss different patterns the students incorporated into their letters, demonstrate what they did on the SMART Board in Microsoft Office Paint.
Day 4
- Begin class brainstorming ideas for more patterns and designs for their letters.
- Reinforce the importance of not overloading a letter with designs.
- Introduce students to the crayola marker (conical tip), that will be used as their media for the project.
- Students will complete the marker test with the teacher.
- Begin by explaining how professionals would have to marker in a project if they were presenting it to a company or prospective clients. These designers would marker with the side of the maker to get a broad tip, and they would marker in one direction.
- The teacher will demonstrate how to marker the first shape.
- First, outline the triangle with the broad tip and then count the amount of marker lines needed to color in the triangle. (9-10 lines) The markering direction will be horizontal.
- Second, outline the circle, and marker in. (15-16 lines) Markering direction will be vertical.
- Third, outline and marker the square. (16-17 lines) the markering direction will be diagonal.
- Students will then marker the rectangle on their own, and select which direction they were comfortable working with. (horizontal, vertical or diagonal).
- Students will then flip their test over and create a T-chart for hot and cool colors.
- With the markers provided and with teacher direction, students will begin to decipher which marker colors are hot and cold.
- The reason for the separation would be for students to practice markering in their artwork with hot colors, because corrections can be made easily over them verses the cool colors.
- Students can begin markering their project with hot colors only.
- After clean up discuss what the hot and cool colors utilizing the SMART Board and the program Art Dabbler.
Days 5, 6 and 7
- Students will need the next few days in order to complete the art project.
- Remind them about the importance of markering correctly.
- Remind them about hot and cool colors.
- Remind them that hot colors need to be used first and once they are finished, they can move onto the cool colors.
- Students will be given a black marker on the last day to fill in any patterns and designs as well as for outlining each letter and pattern.
Day 8
- Begin with a teacher directed demonstration on how to out line the art project with a black marker.
- The teacher will utilize the SMART Board and the program Microsoft office Paint for the demonstration.
- Students will have to outline each letter as well as their patterns and designs.
- Upon completion of the art project, mirror image name, students will complete a rubric/reflection form about their artwork.
Assessment
- Students' artwork completed and handed in to the teacher.
- Name is in Mirror Image
- Patterns are in Mirror Image.
- Markering Technique was evident throughout artwork in one direction.
- Color was thought through using hot first and then cold.
- Artwork was outlined in black.
- Completed Rubric/Reflection Form
Vocabulary
- Mirror Image: an image of an object, plan, person, etc., as it would appear if viewed in a mirror, with right and left reversed.
- Reflection: the act of reflecting or the state of being reflected.
- Hot Colors: the yellows and reds of the color spectrum, associated with fire, heat, sun, and warmer temperatures; also called hot colors
- Cold Colors: the blues and greens of the color spectrum, associated with water, sky, ice, and cooler temperatures; also called cold colors
- Graphic Designer: The practice or profession of designing print or electronic forms of visual information, as for an advertisement, publication, or website.
- Interior Designer: a person whose profession is the execution of interior design.
- Also called interior decorator.
- Fashion Designer: someone who designs clothing [syn: couturier, clothes designer, designer]
- Conical Tip Marker: a slender or pointed end
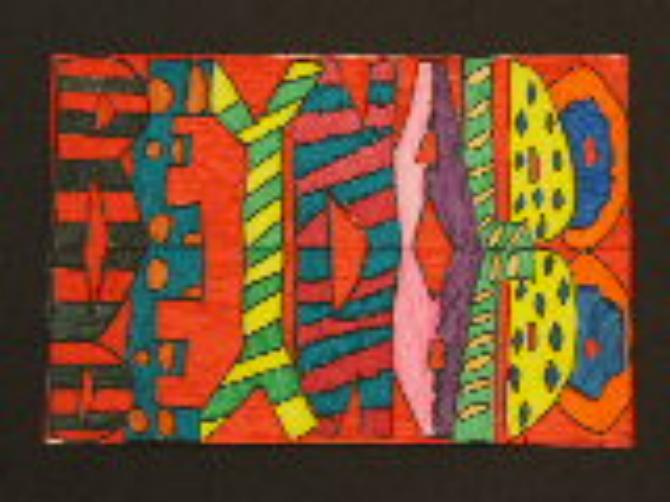
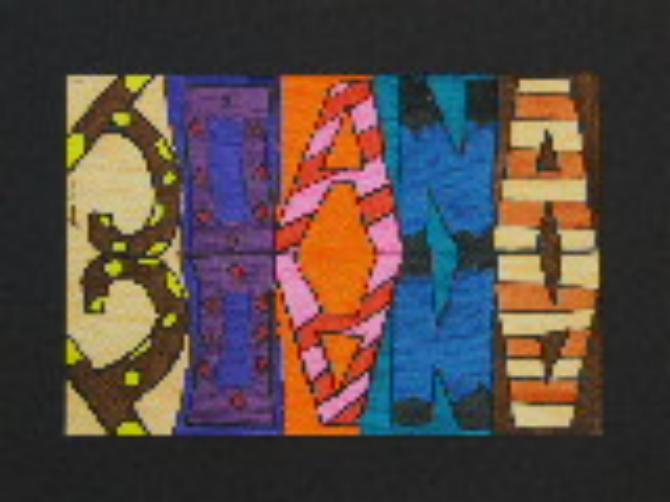
Student Artwork
Examples of student artwork.

Description
- In this lesson plan, students will learn about the mirror image technique and apply it to their name.
Materials and Resources
ART PROJECT EVALUATION.doc
MARKER TEST.doc
hot cold t chart.doc
Reflections in Art
mirror image.notebook
Duration
- Eight, 45-minute class periods
Learning Objectives
Students will ...
- Learn the basic drawing technique of mirror image.
- Apply their knowledge of mirror image to create their own art project based on their own name.
Materials
Art Supplies
- 9X12 White Drawing Paper, Pencil, Large Eraser, Markers (Conical Tip), Marker Test, Newspapers
Technology
- Art Dabbler, LCD Projector, Laptop, Internet, Microsoft Office Paint, SMART Board, SMART Board Notebook
Procedure
Day 1
- Introduce mirror image by utilizing the SMART Board notebook on "Reflections in Art"
- Students will use appropriate art language to discuss various famous works of art and how the technique mirror image was used in them.
- Students will watch a teacher directed demonstration on folding the white drawing paper.
- Students will begin by folding a piece of 12X18 white drawing paper in half.
- ex. place paper in front of you horizontally, and bring top of paper to meet the bottom and create a fold.
- Students will then open up their paper and place it in front of them horizontally.
- The students will watch a teacher directed demonstration on how to draw a name in block or bubble letters across the top of the white drawing paper.
- Students will then begin sketching their own name across the top of their paper in block or bubble letters.
- Students must make sure they draw their name in all capital letters in order to create designs inside each letter.
- Students must make sure each letter is drawn to the top of the paper, and then down to the fold, so letters are six inches.
- Students may leave a space between each letter or attach them together depending on the length of their name.
- After clean up the teacher will demonstrate how a name would be drawn in mirror image utilizing the SMART Board and Microsoft Office Paint.

