Learning Experience/Unit
Community Construction by St. Lawrence-Lewis BOCES
Subject
English Language Arts (NYS P-12 Common Core)
Grade Levels
Elementary, Kindergarten, 1st Grade, 2nd Grade
Assessment
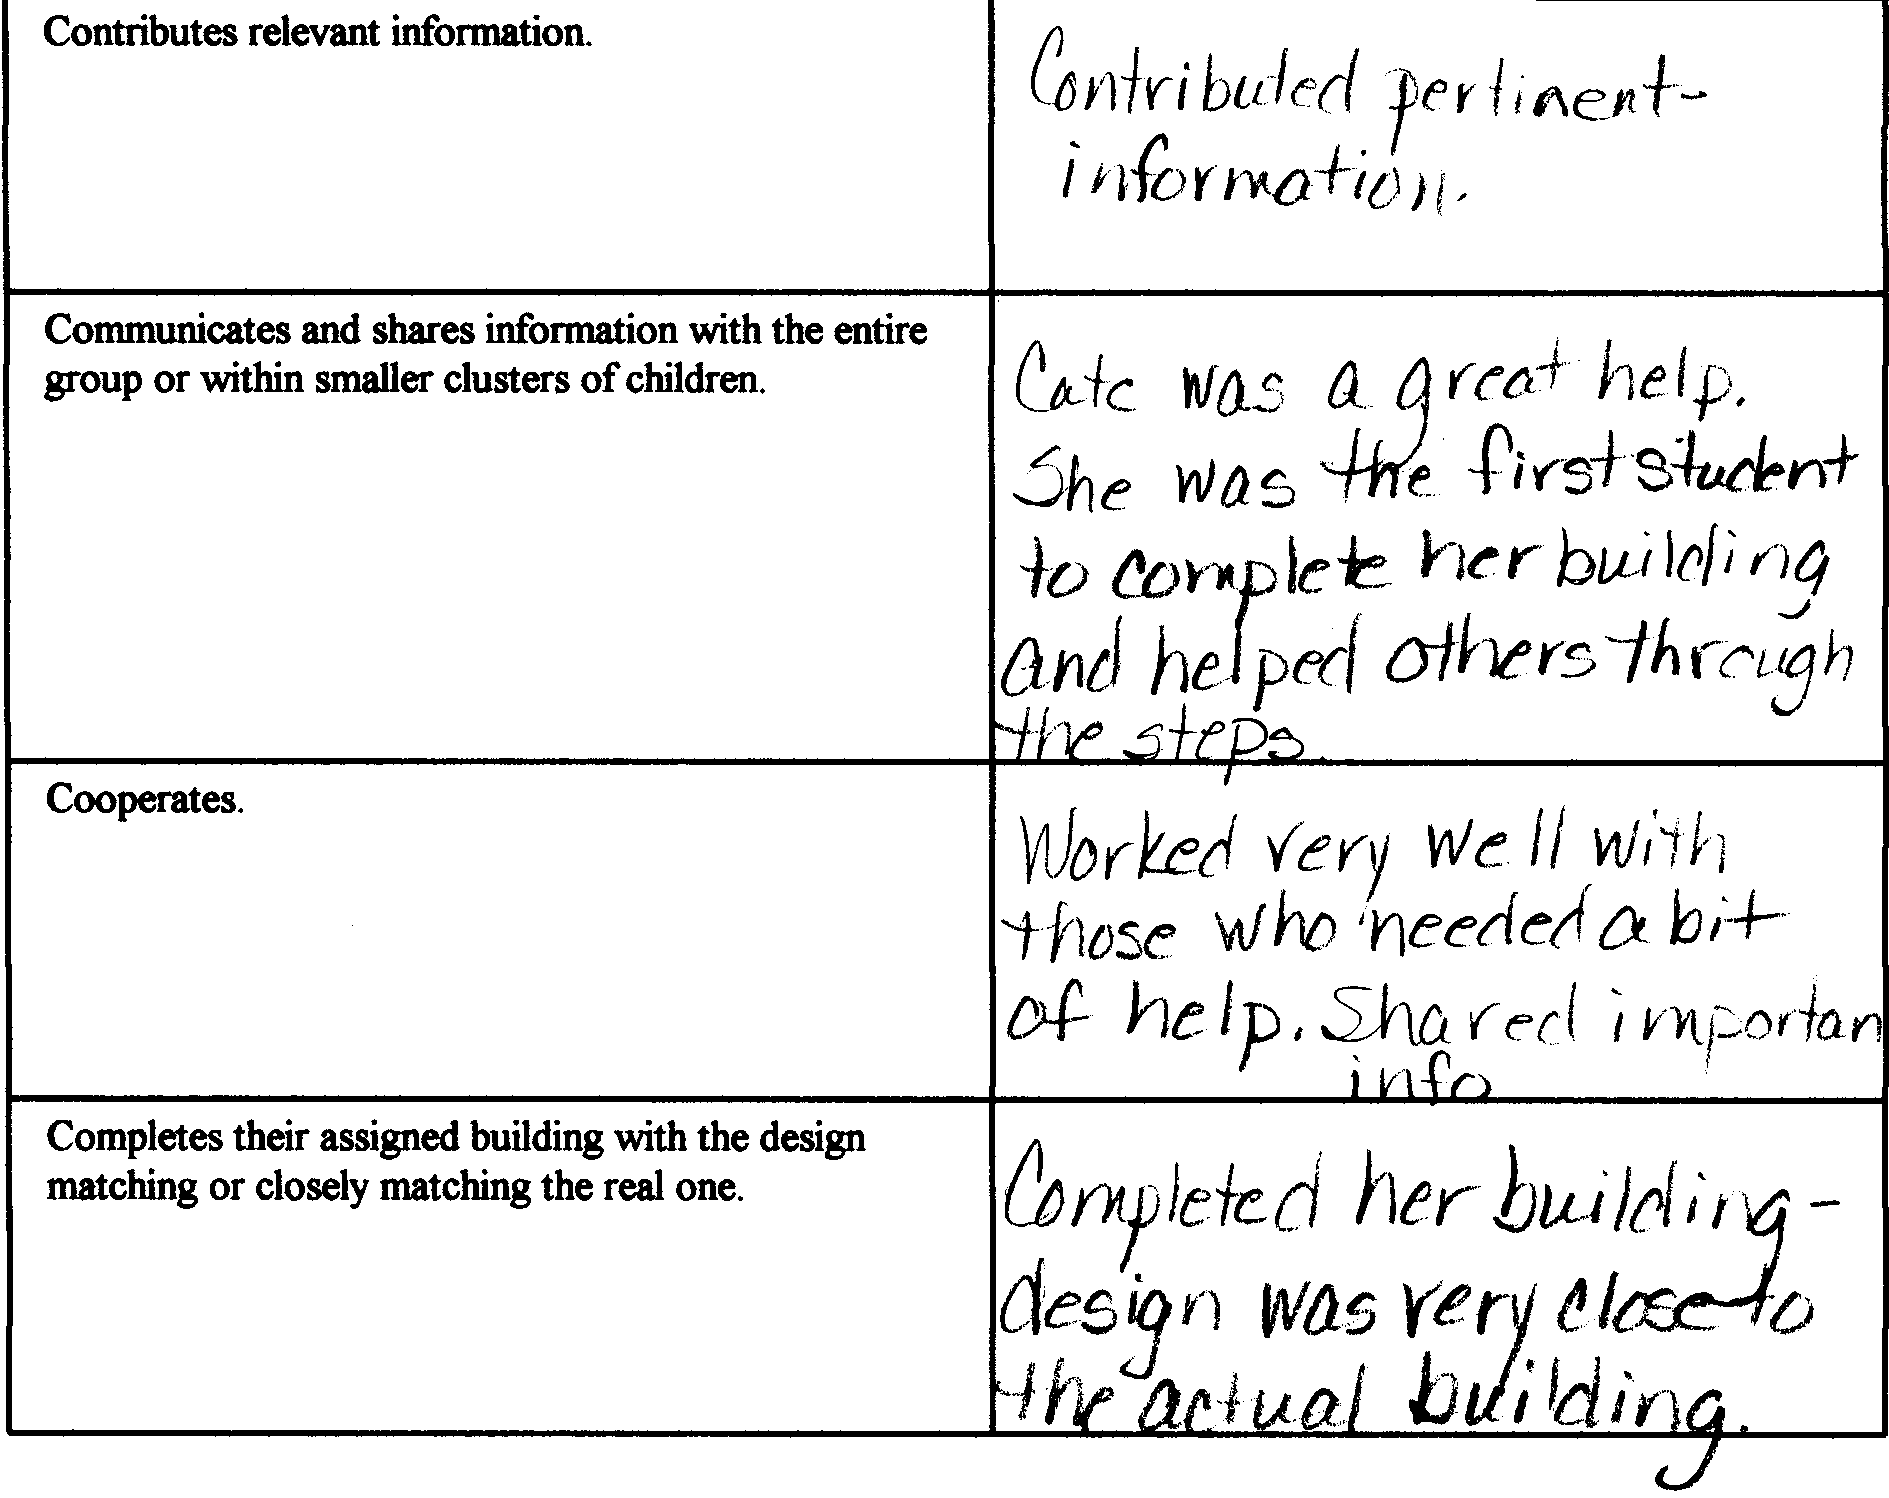
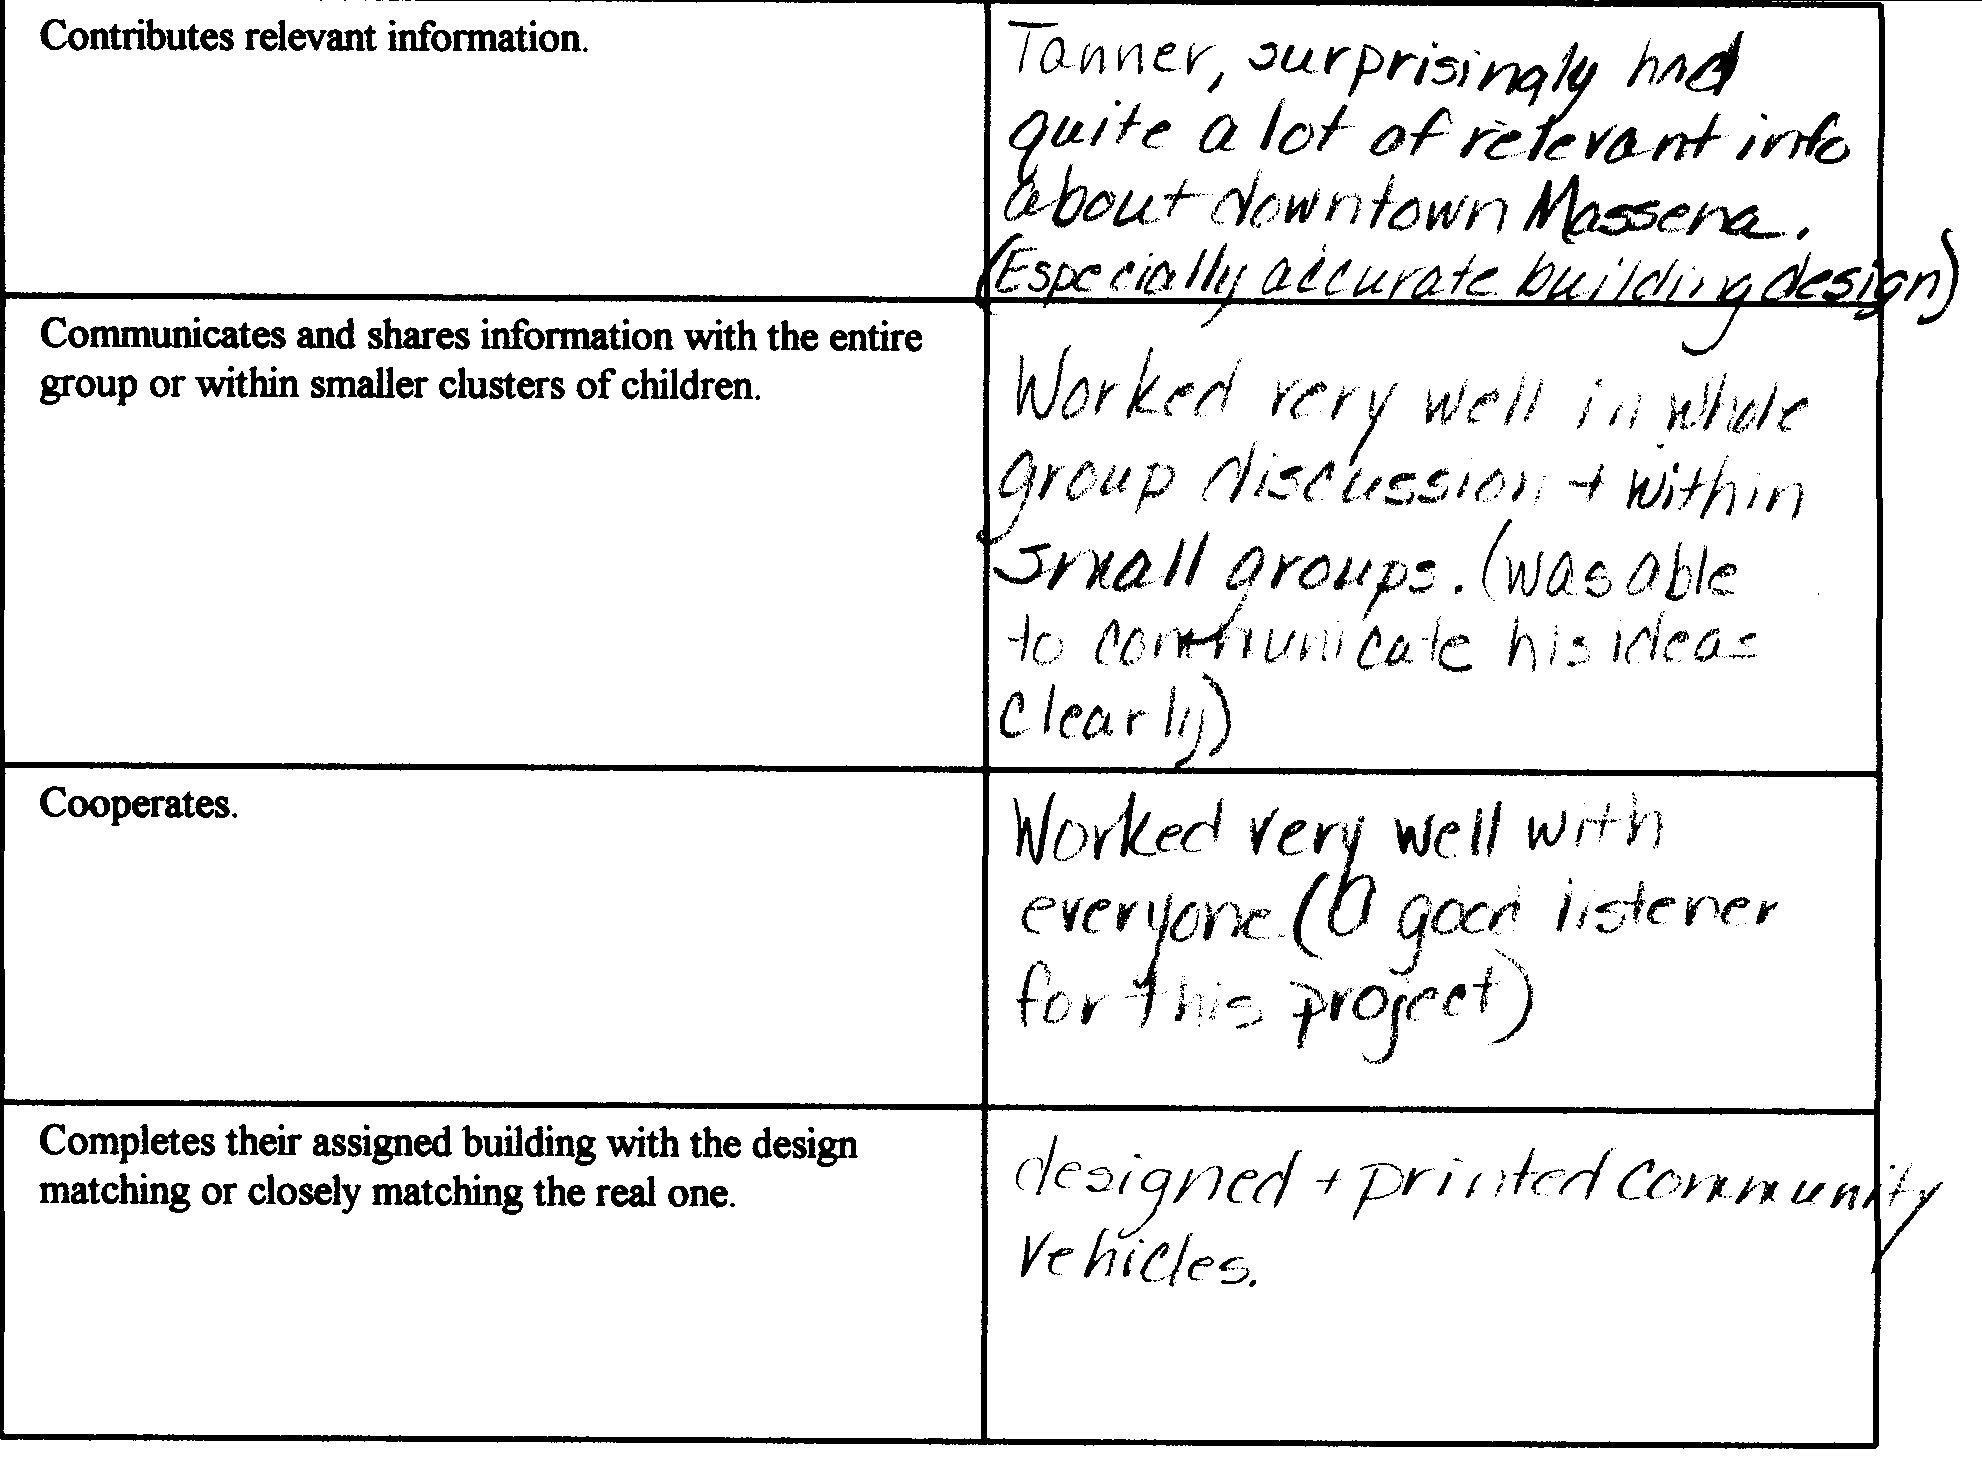
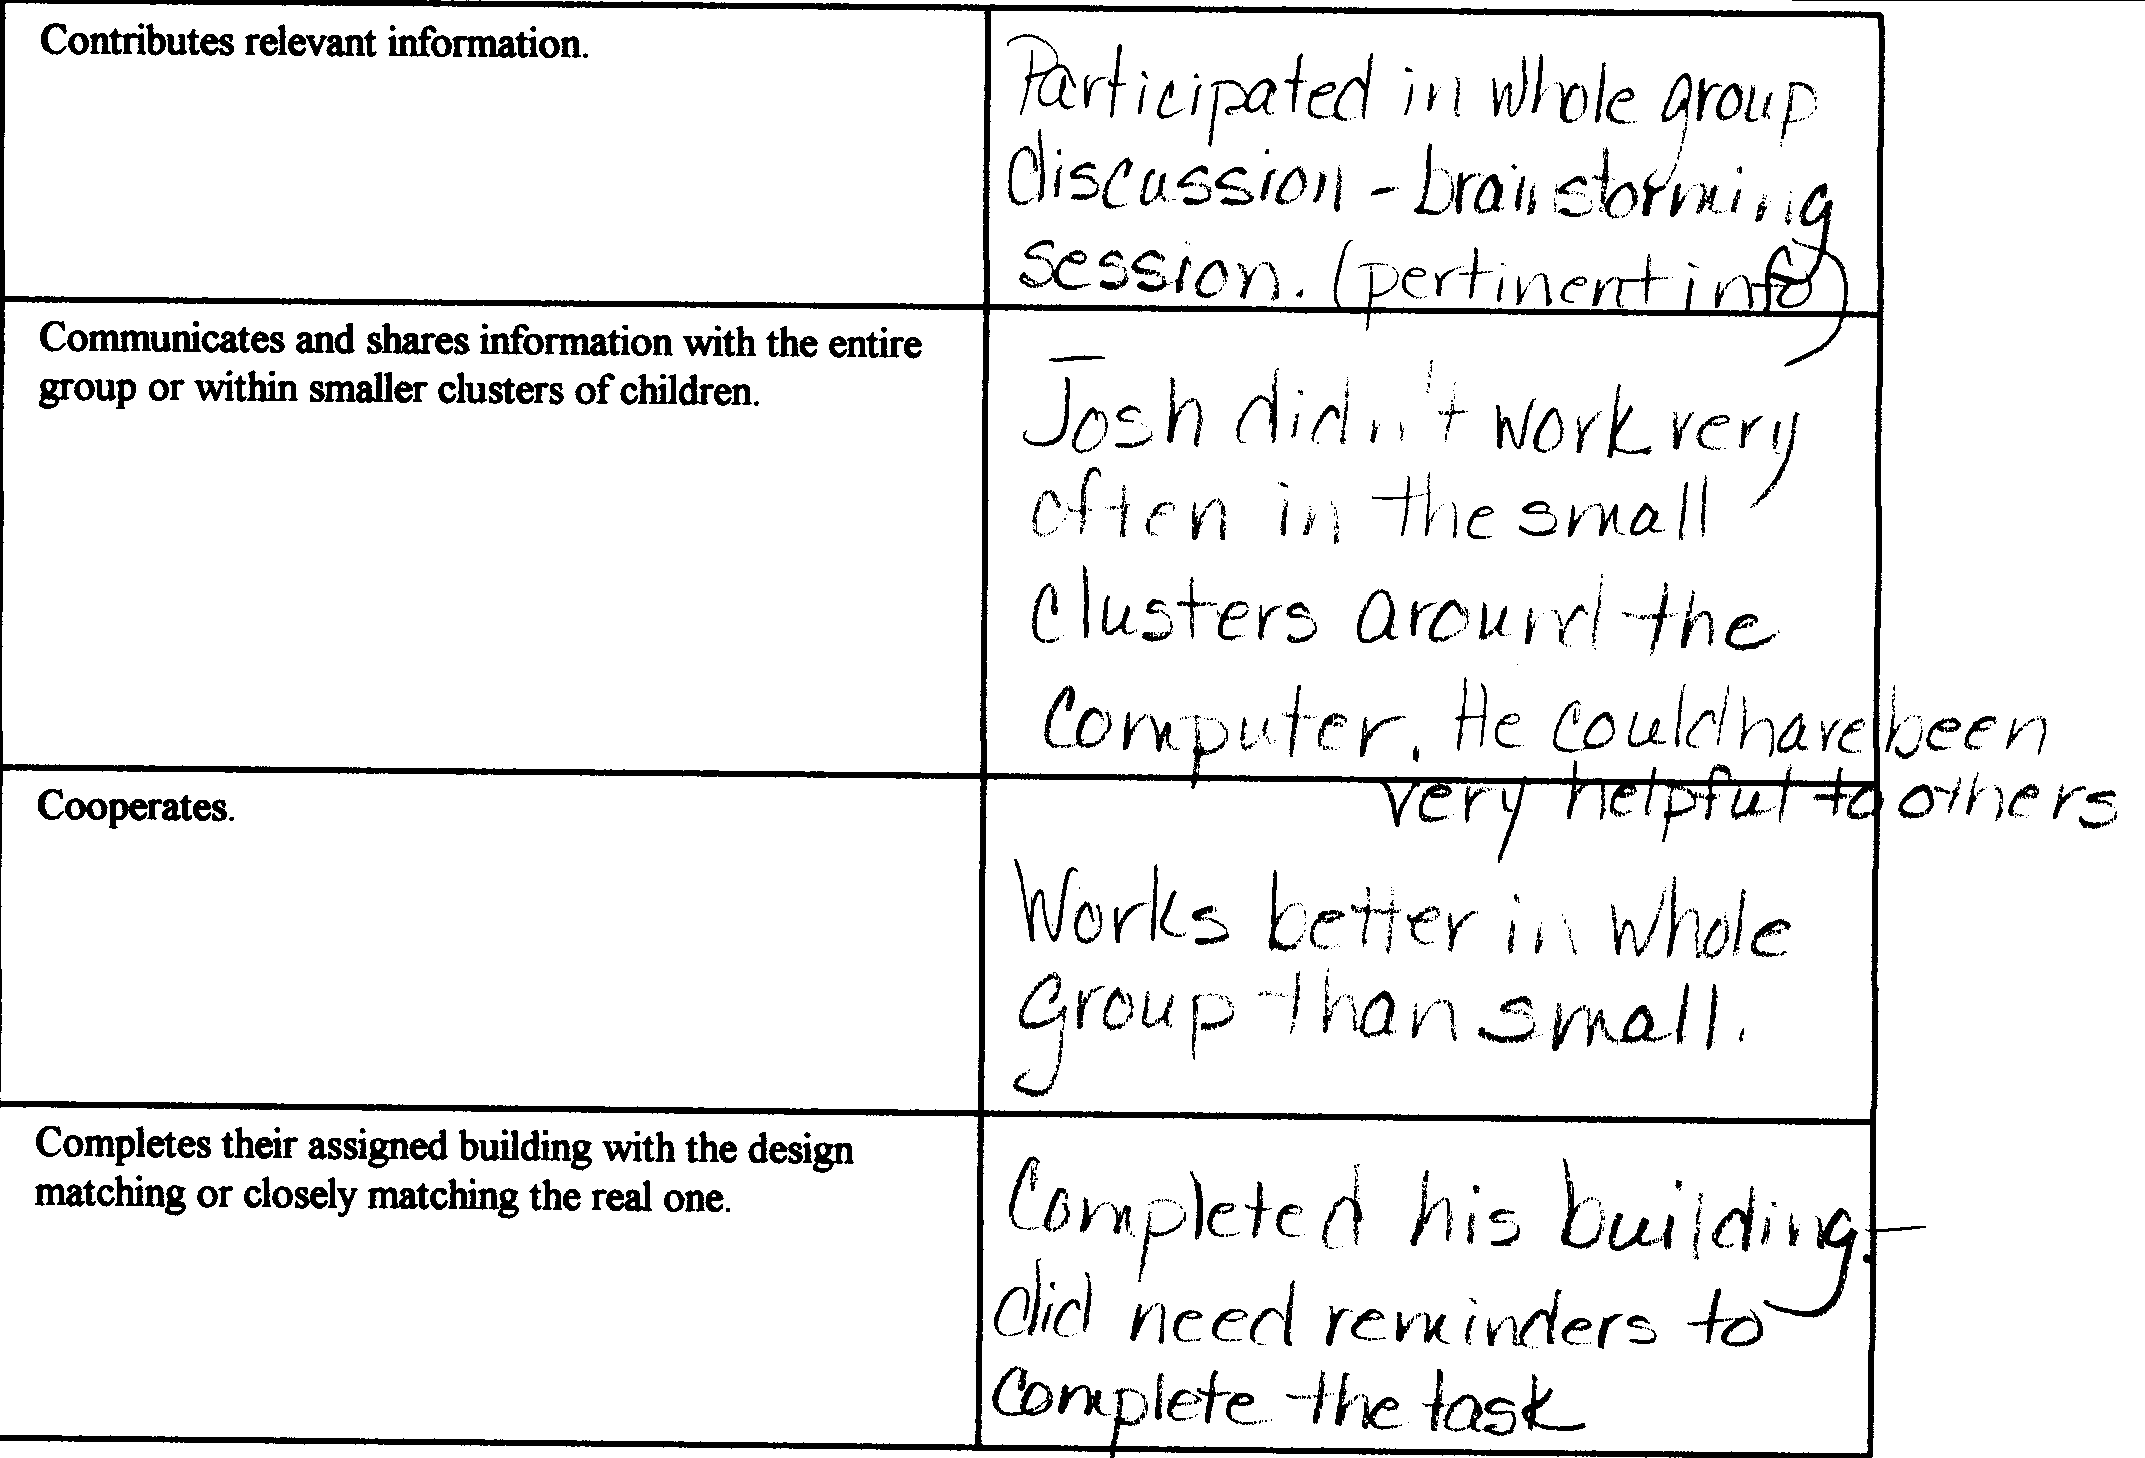
This project was informally assessed because it was the first experience many of the children had with software and with a task that was so complicated. Once I had walked through the steps needed for a completed building, I stepped back and let them take over. See attached informal rubric.
Learning Context/ Introduction
This learning experience is a culminating project to reinforce the unit on communities. Using a software program, the students will create the community they live in.
Duration
The students will take turns completing their individual tasks during breaks and before school. This should take five days.
Once everyone has a printout of his or her building, we will take one class period (45 min) to assemble the model of downtown Massena.
Instructional/Environment Modifications
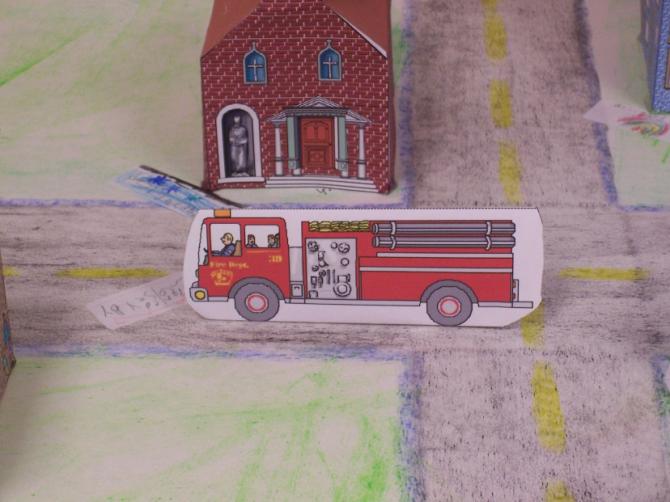
Some modification was required for a student with ADHD. Luckily, I knew this student was very interested in vehicles. Therefore, he was given the task of identifying and printing the vehicles that a community helper would use. (For example: firemen – fire truck)
Procedure
As we complete our unit on Communities, the entire class will take part in a brainstorming session to identify the community buildings in the downtown section of Massena, N.Y.
Then each student:
- Will be assigned the task of building a community building located in the downtown area of Massena.
- Will construct this building using the classroom computer and the
Community Construction Kit software.
- Help to assemble a 3-D model of downtown Massena.
The following steps will be completed to design the exterior of the assigned building:
- Once on the Main Choice screen, the student will click the “Make a Building” option.
- At the Building Shape screen, the Today Building Set will be selected, and then the student will select a building shape that matches their assigned one.
- Next, they will choose the proper roof type for their building.
- Here, the student will design the building’s exterior to match the real one, choosing the appropriate doors, windows, additions, trim, roofing, siding, signs, and color.
- Once the student is satisfied with their design, the will save it to the folder. (Giving the folder their own name)
- Finally, the student will choose the print option to print their building.
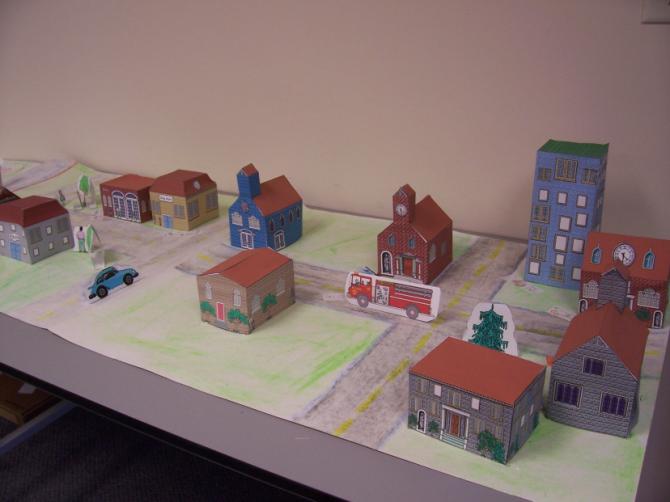
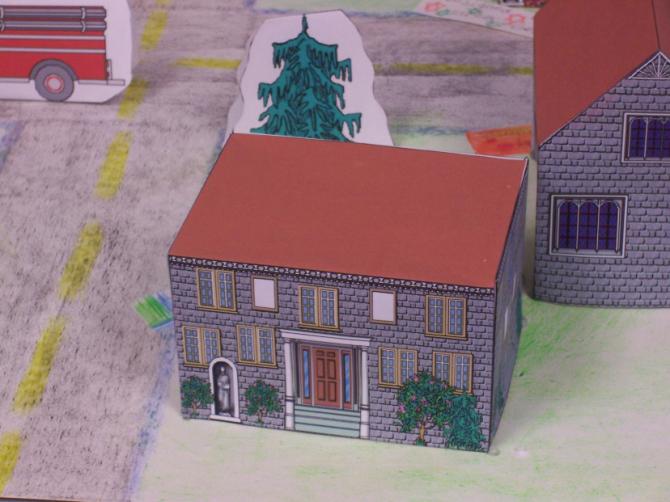
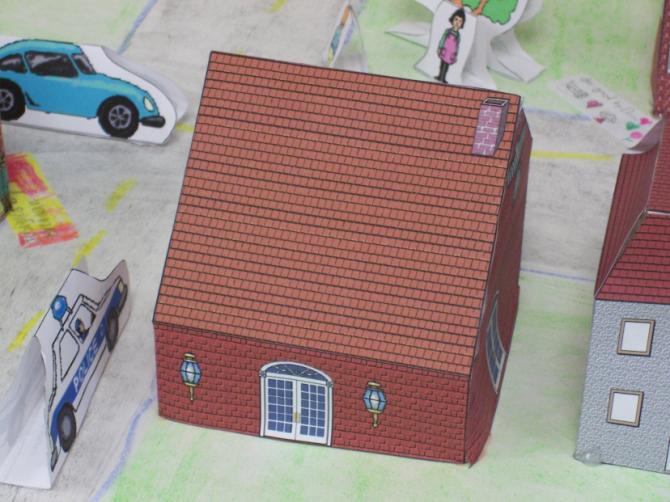
- When every student has completed their individual task, the teacher will cut out, fold and glue their designed building, to end with a 3-D model.
- As each building is completed, every student will hot glue his or her model to our poster board map of downtown Massena, in the appropriate location.
- When all is completed, the students will take turns going back to the computer and software to select and print from the “creatures and things” option cutouts of people (esp. Community Helpers), animals, plants, and vehicles to add the finishing touches to our 3-D map.
Reflections and Feedback
This was a fun project, where students worked individually and in groups to produce a model of their own community. Everyone enthusiastically worked toward our goal.
Once completed, we displayed the 3-D map outside our classroom, and all who saw what we had accomplished were impressed with our efforts, including the parents who had the opportunity to see our model as they came in for conferences.
I learned that the students were very quick to pick up on the skills they needed to design their buildings. To them, this project was not the usual task they had to complete, but an experience they thoroughly enjoyed and learned from.
Student Work
Class project and rubrics
Related Resource
Community Construction Kit Software (Tom Snyder Productions/ Scholastic)
Scissors, glue, hot-glue gun, glue sticks, poster board, crayons.
A color printer

